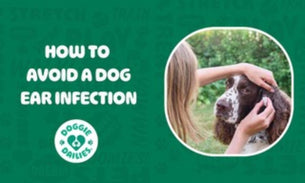
It isn't necessary to clean some dog's ears. However, for others - especially those with floppy ears - ear cleaning is something that should be done regularly.
While those floppy ears are undeniably adorable, they tend to trap moisture and make it easier for dirt and bacteria to become trapped. This makes floppy eared dogs, like Beagles and Basset Hounds, more susceptible to ear infections.
Smelly ears, frequent head shaking, and persistent itching are all dog ear infection symptoms. Keeping your dog's ears dry and clean can help avoid potential problems.
“Believe it or not, there is a right and a wrong way to clean your dog's ears.”
Use These Tips Below
-
Never Use Q-Tips
Did you know when you use a Q-Tip on your own ears, you are actually packing down the "junk" and pushing it further into your ear canal? The same thing happens if you use a Q-Tip on your dog's ears, and if they move their head, you could damage the dog ear canal.
Also, don't ever use hydrogen peroxide or alcohol to clean your dog's ears, as this can be quite irritating. Take cues from your dog, as well. If they yelp in pain at any time during the process, then stop right away. This may be a sign of a dog ear infection.
-
Use Plenty of Liquids
It is crucial that you dissolve all wax buildup and debris that have accumulated in your pup's ears. An effective way to accomplish this is by filling up the ear canal with a safe ear cleaning solution.
Once the liquid is in place, use your hands to gently massage the lower portion of the dog's ear to ensure it works properly. This is going to make a squishy sound and should be done for approximately 30 seconds.
-
Massage Repeat
Once you have massaged the ear for 30 seconds, you can wipe out any ear gunk you can see. If you see a lot of "gunk" on the tissue, then it will be a good idea to repeat the steps mentioned above. Simply add more ear washing solution, massage and wipe once more.
If you repeat this and still see quite a bit of brown goop, then let your dog be for a few days and then try again. This will allow the cleaner to work its magic and soften the wax, so you can easily remove it from your dog's ear.
If there is still a lot of goop coming out of your dog's ear, it may be the sign of an infection. It is a good idea to have your vet check it out.
-
Use a Cotton Ball to Clean Out Any “Goop”
If you have a pup who is a willing participant in the ear cleaning process, then use a cotton ball to clean out the goop. You can soak the cotton in an ear cleaning solution until it is dripping. Avoid using a tissue for this, as it can fall apart in your dog's ear.
Place the cotton ball into your dog's ear and then massage the ear just like before. After about 30 seconds, remove the cotton ball and use a dry tissue to wipe any gunk away. Repeat if needed.
-
Don't Worry About Remaining Cleaning Solution
There's going to be some of the cleaning solution left behind. Don't worry about it. It isn't going to cause any harm.
If you are planning on a complete grooming session for your dog, it is best to start by cleaning your dog's ears and then give them a bath. This lets you remove any left-over goop.

-
Finish with Praise and Treats
Make sure you finish the ear cleaning process with plenty of praise and a few treats. When there is something positive associated with the experience, the dog will be a more willing participant next time.
Cleaning your dog's ears isn't a difficult process, but it is important to know how to do it right. To learn more about the proper and safe way to care for your pet, visit the Doggie Dailies website. Here you can find quality ear cleaning solutions, as well as a myriad of other pet healthcare products.


